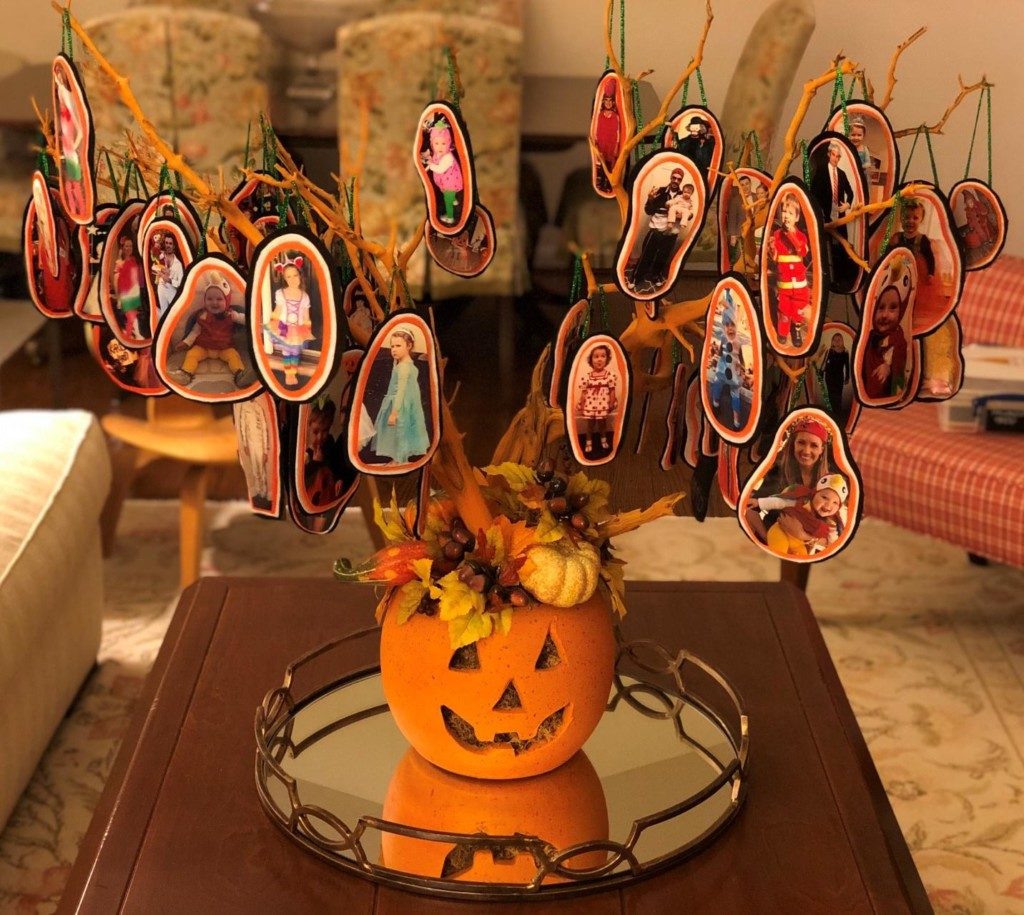
Halloween is huge in our house. We start decorating well before September is over and the end result is an explosion of tombstones, skeletons, ghosts, and spiderwebs on our front lawn. It gets more obnoxious every year, and I love it.
One of my favorite indoor decorations is our Halloween Tree – a small potted “tree” with ornaments displaying pictures of our family in Halloween costumes from years past. I borrowed the idea from my mom, who started the tradition when I was little. It is such a fun way to look back at all the crazy/funny/embarrassing costumes everyone wore and keep those memories alive. It’s also a great activity for the kids—they love to help hang the ornaments!
Here’s how you can make your own Halloween Tree:
To Make the Tree
Supplies Needed
- 1 or 2 manzanita branches (You can find these at the flower mart, craft stores, or online.)
- A wide, sturdy, pot. (I used a terra cotta jack-o-lantern pot, but any pot will do, as long as it isn’t too shallow or narrow.)
- Floral foam
- Craft moss
- Decorative gourds, fall leaves, etc.
- Glue gun
OR
- If you are pressed for time or prefer something a bit simpler, I found this tree at Michaels.
Steps:
- Place a large block of floral foam inside the pot.
- Stick the thickest parts of the branches into the floral foam and arrange them so they stand upright like a tree.
- Once you have your branches in place, stuff craft moss around and on top the floral foam, filling all the empty space tightly so the branches are snug.
- Using a hot glue gun, add decorative leaves, gourds, etc. around the base of the tree.
To Make the Ornaments
Supplies Needed:
- Black, orange, and white felt
- Fabric glue
- Glitter glue
- Yarn or string
- Flat-backed gemstones (optional)
Steps:
- Print out photos of your family members in Halloween costumes.
- Cut around the person in each photo so only the outline of them in their costume is left.
- Using fabric glue, glue the photo onto a piece of orange felt.
- Cut the felt, using the shape of the photo as your guide. Make sure to leave about ¼ inch of felt around the picture.
- Repeat step 4 with the white felt, then the black felt. When you are done, the photo should be framed in a trio of orange, white, and black.
- Turn the ornament over face down. In glitter glue, write the year on the back.
- Cut out a small piece of yarn/string and hot glue the ends to each side of the top of the ornament.
- Optional: Glue a small gem on top of the ends of the string.
- Let everything dry overnight, then hang ornaments on the tree!
It might seem like a lot of work, but this tradition is easy to keep up once the tree is made.
(Helpful tip: buy extra felt, glue, string, gems, etc., and store with the pictures so you have everything ready to go for next year!)
Will any of you be making this tree? If so, share pictures of your final product with #mpmomsblog!
Happy Halloween!


