


 If you haven’t heard about smash cakes, it’s becoming a rite of passage for babies turning one year old. Basically, you put your one year old in front of their cake on the floor with a cute background behind them and snap photos as they dig into the cake. A basic Google image search of smash cakes will bring up thousands of photos of cute babies covered with icing, as they get their first taste of sugar and make a cute mess in the process.
When I saw photos online of this, I knew I had to do it with my little one. So, I showed my husband some images, and he also entertained the notion. I immediately started looking into local photographers to capture these priceless photos of my son, but I quickly learned that this would not be cheap. As I was discussing the cost with my husband, he came up with a brilliant idea! He suggested that we… “just to do it ourselves.”
We both agreed that we take decent photos, that I was somewhat creative, and that I could easily get at least one great shot. It took me a few months of looking at images online and reading blog posts to figure out just how to make a Smash Cake and create the perfect scene, so I’ll save you time and tell you the tips and tricks I learned from my research to create your very own DIY Smash Cake.
Photography
This is clearly the most important part. Having at least one great photo that doesn’t turn out too light or too dark is the whole point of a smash cake. Otherwise, we would just stick baby in their highchair and let him/her go to town.
The first thing you want to do is start looking where you would like to shoot. The best way to go about that is to pay attention to the lighting around your house (or wherever you want to take the photos). Make sure you pay attention to the time of day, as well. Once you find that perfect lighting, take photos of that spot. That way you can see what the photos will look like on the camera.
On the actual Smash Cake day, snap more photos before you bring baby in. Setting up the cake and background before baby ensures you can get the lighting correct, and the background just the way you want it. Plus, it is nice to have a few pictures of the “before” cake and background.
When you are ready for baby, get ready to snap pictures FAST. Our little guy needed help, so make sure you dress the part, too. Having some photos with mom or dad would have come out super cute, but neither my husband nor I dressed for photos, so we had to forgo that option. Don’t forget to take photos from above and of your baby’s feet.
Background
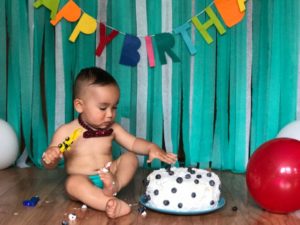
 There are millions of ideas. This can get as cheap or as expensive as you would like. On my background, I spent less than $10. I purchased the Happy Birthday Banner from Target in their dollar section, two bags of streamers in turquoise and white, and a bag of balloons. I cut a long piece of painter’s tape, then cut and layered the streamers to the length I wanted by sticking them to the tape, hung the Happy Birthday banner to the appropriate length, blew up a few balloons, and, BAM, background was done.
Hint: the banner has to sit fairly low if you want it in the shot. That’s why it’s important to take practice shots before you bring cake and baby into the scene. Most importantly keep it simple. You want the focus to be on baby and NOT on the background. When you look at images online you’ll notice that you want the baby to stand out first, not the background.
Clothes or No Clothes
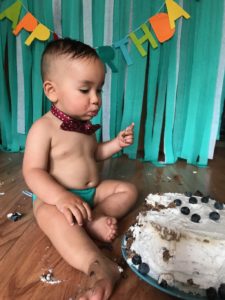
Again, there are lots of options here. The best piece of advice here is, if you go naked, use a cloth diaper. They look better for the photos. If you go with clothes, make sure they coordinate with the background, so baby and background don’t clash.
Cake
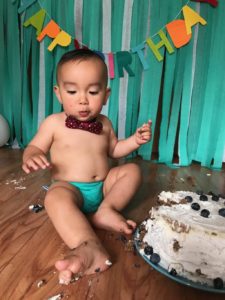
A lot of blogs suggested buying a professionally made cake. I personally didn’t want to subject my baby to refined sugar, at least not yet, so I decided to make a no-sugar-added cake with a whipped coconut cream icing. I was happy with how the cake turned out, but I wish I would have prepared more by making the cake smaller and taller.
Since I made the cake at home, I only had to buy one ingredient, which cost around ten dollars. My little one was not really into the cake, so I did try to help him out a little. Still with no interest, I offered him a spoon and that seemed to help a little. Do put some thoughts into the colors that will be smeared on your little one. In other words, I wouldn’t recommend chocolate!
Team Effort
Enlist help from your partner or friend. One of you should be the baby wrangler and the other will be the photographer. I made the mistake of being both, while I asked my husband to film the cake eating process. For us, our little guy wasn’t really into it, therefore, if we did it again, I would not video and one of us would take care of baby. Have the bath ready. Once baby is done, have someone take the baby immediately to the bath while the photographer snaps some last photos of the aftermath… hehe, and then cleans up.
All in all, I am super happy with how everything turned out. I spent about $25, not including my time. If I were to do it again, I would just use the camera function, instead of the portrait function on my iphone, and have one photographer, one baby wrangler, and no video. Of the hundred plus photos we took, maybe fifteen of them were good shots. Of those fifteen, maybe one or two of them came out perfectly! Did you do a smash cake for your baby’s first birthday? Share with us your DIY cake smash photos and tips!


